
Pet Ear Cleaning: Complete Guide to Getting Started

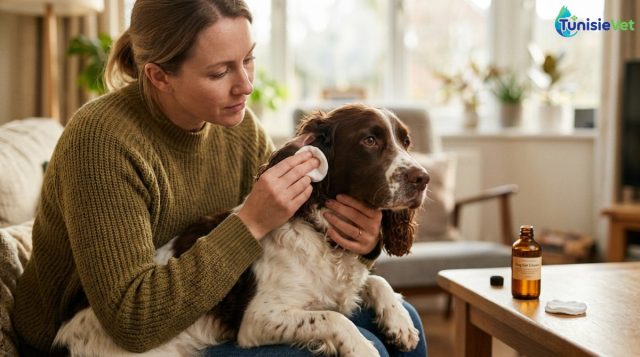
Cleaning your pet's ears is a simple routine that prevents earwax buildup, bad odours, and painful infections in dogs, cats, and rabbits. However, when done incorrectly, it can irritate the ear canal instead of protecting it. This practical guide brings together essential veterinary advice to help you master the right techniques, avoid common mistakes, and know when to consult a professional.
1. Why clean your pet's ears
The ear canal naturally produces earwax that protects the skin and removes impurities. In some animals, this self-regulation isn't enough: excess hair in the canal, floppy ears that limit airflow, or a predisposition to produce more secretions. Regular cleaning then helps prevent earwax accumulation, bacterial or yeast growth, and ear infections (otitis).
Proper maintenance also allows you to spot abnormalities early: redness, unusual odour, discharge, or sensitivity to touch. These signs should always lead to a veterinary consultation rather than more intensive cleaning.
2. How often should you clean your pet's ears
The ideal frequency depends on the species, breed, and ear shape. Cleaning too often can weaken the skin of the ear canal, while infrequent care allows earwax to accumulate.
| Ear type | Examples | Recommended frequency |
|---|---|---|
| Upright ears, low hair | Many cats, some dogs | About once a month |
| Floppy or hairy ears | Dogs with hanging ears | Every one to two weeks |
| Ears after swimming or water grooming | Active outdoor dogs | After each swim |
| Animals with no particular signs | All species | Regular visual check, cleaning only if needed |
If you're unsure about the right frequency for your pet, a weekly visual inspection helps determine whether cleaning is truly necessary.
3. Equipment and products to use
Effective cleaning starts with the right tools:
- An ear cleaning solution designed for the species, available from a veterinarian or pet pharmacy.
- Lint-free wipes or soft cotton pads—never use cotton buds inserted deeply.
- Treats to reward your pet and gently build positive associations.
It's strongly advised against using water alone, alcohol, vinegar, or products not intended for ear care, as these can irritate or dry out the ear canal skin.
4. Step-by-step ear cleaning procedure
- Place your pet in a calm, quiet area on a stable surface, ideally after a period of relaxation.
- Visually inspect the ear: check colour, odour, earwax presence, redness, or foreign objects.
- Apply the ear cleaning solution in sufficient quantity to the canal without forcing the applicator deep inside.
- Gently massage the base of the ear for a few seconds to loosen debris.
- Let your pet shake their head: this natural reflex helps move residue outward.
- Wipe the outer ear and canal entrance with a wipe, never inserting anything beyond what's visible.
- Reward your pet to create a positive association with ear care.
5. Common mistakes to avoid
- Using cotton buds: they risk pushing earwax deeper or injuring the canal.
- Cleaning too frequently: this can irritate the skin and disrupt the ear's natural balance.
- Ignoring odours or discharge: these signs need veterinary attention before any cleaning.
- Forcing a stressed pet: it's better to stop and try again later gently.
- Cleaning just before a vet check: this can mask signs important for diagnosis.
6. When to see a veterinarian
Certain signs should never be managed with home cleaning alone:
- Strong or unusual persistent odour.
- Coloured, thick, or heavy discharge.
- Intense scratching or repeated head shaking.
- Redness, swelling, or pain when touched.
- Pet tilting their head to one side or losing balance.
These symptoms may indicate an ear infection, foreign object, or infection requiring specific treatment. In this case, it's essential to consult qualified veterinarians rather than continuing home care, which could make the situation worse.
Summary
- Adjust ear cleaning frequency based on your pet's ear shape and type.
- Use only a species-appropriate ear cleaning solution—never water, alcohol, or cotton buds.
- Work gently: apply, massage, then wipe without inserting anything deep into the canal.
- Observe ears regularly to spot any unusual signs early.
- Contact your vet immediately if you notice odour, discharge, pain, or intense scratching.
Frequently asked questions
How often should you clean your pet's ears?
This depends on ear shape and your pet's earwax production tendency. Generally, regular visual checks help you decide if monthly cleaning or more frequent care is needed.
Is cleaning a cat's ears the same as a dog's?
The general principle is similar, but cats often need less frequent maintenance and particularly gentle handling. Use a solution designed for the species and proceed very gradually.
What should I do if my pet is in pain when I touch their ear?
Don't push through or continue cleaning if your pet shows pain. This can signal an infection or inflammation needing veterinary assessment before any intervention.
Ear cleaning, done with proper technique and at the right frequency, contributes to your pet's lasting comfort and health. When in doubt about technique or symptoms, consulting qualified veterinarians is the best way to protect your companion's hearing long-term.
Leave a comment
Be the first to comment on this article.