
How to Clean Your Pet's Ears: Complete Step-by-Step Guide

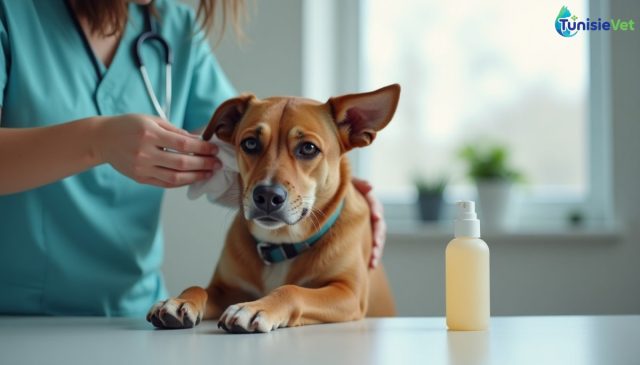
Cleaning your pet's ears is a simple practice that prevents many infections in dogs and cats. If done incorrectly, however, it can irritate the ear canal and promote otitis. This practical guide explains, step by step, how to safely clean your animal's ears, which products to use, and what mistakes to avoid.
The TunisieVet app to care for your pet
Vets, adoption and products






1. Why ear cleaning is important
Ears naturally produce cerumen (earwax) that protects the ear canal against dust and microorganisms. In some animals, this production becomes excessive and accumulates, creating an ideal environment for bacteria, yeast, and parasites. Regular cleaning adapted to each animal reduces this risk and also allows early detection of an infection beginning to develop.
Breeds with floppy ears (such as certain spaniel or basset hound types) and animals that swim frequently are particularly at risk, as moisture becomes trapped in the canal and promotes microbial growth.
2. How often should you clean your pet's ears?
The ideal frequency depends on the shape of the ear, the animal's lifestyle, and its tendency to produce cerumen. Cleaning too frequently can weaken the skin of the canal, while cleaning too rarely allows dirt to accumulate.
| Ear type | Example animal | Recommended frequency |
|---|---|---|
| Upright ears, well-ventilated canal | Herding dog, cat | Once every two to four weeks |
| Floppy ears, poorly ventilated | Spaniel or basset hound type | Once a week to every ten days |
| Swimming animal or living in humid climate | Active dog, outdoor cat | After each swim or prolonged outdoor activity in rain |
| Animal with no particular issues | All species | Weekly visual inspection, cleaning as needed |
3. Equipment and products to use
Effective ear cleaning doesn't require sophisticated equipment, but choosing the right products is essential for your animal's safety.
- An appropriate ear solution: available from veterinary pharmacies or professionals, it is formulated to dissolve cerumen without irritating the skin.
- Non-shedding compresses or soft cotton, preferable to cotton swabs.
- Treats to reward your animal and associate the procedure with a positive experience.
- A towel to dry the area if your animal shakes its head during or after the procedure.
Absolutely avoid plain water, alcohol, undiluted vinegar, or any product not intended for ear use: these substances can burn or dry out the delicate skin of the canal.
4. Steps for cleaning ears correctly
- Place your animal in a quiet location, preferably after physical activity so it is relaxed.
- Examine the ear in good light: a healthy ear is pink, has no strong odor, and shows no redness.
- Apply the ear solution directly into the canal, following the quantity indicated on the product.
- Gently massage the base of the ear for a few seconds to loosen the debris.
- Allow your animal to shake its head: this natural reflex helps bring residue toward the outer canal.
- Wipe the ear flap and canal entrance with a compress, never inserting the object deep inside.
- Reward your animal so it associates this moment with a pleasant experience.
5. Common mistakes to avoid
Some habits, though widespread, weaken the ears instead of protecting them:
- Using a cotton swab: it risks pushing cerumen deeper into the canal or injuring the eardrum.
- Cleaning too often: this irritates the skin and can upset the natural microbiome of the canal.
- Ignoring unusual odor or discharge: these are warning signs that should never be addressed solely by cleaning.
- Cleaning an already irritated ear without professional advice, which can increase pain.
- Forcing a stressed animal: it's better to stop and try again later, even if you need to split the procedure into several short sessions.
6. When to consult a veterinarian
Regular cleaning never replaces professional diagnosis. Certain signs should prompt quick action:
- A persistent strong or foul odor.
- Thick, colored, or abundant discharge.
- Frequent scratching, repeated head shaking, or head tilting.
- Redness, swelling, or pain when touched.
- Black, granular cerumen that might suggest the presence of ear parasites.
In these situations, it's recommended to consult a professional quickly rather than intensify home cleaning. You can find a practitioner near you via the directory of veterinarians, or visit the dedicated page for veterinarians for dogs if your companion shows these symptoms.
In summary
- Adjust the frequency of ear cleaning to your animal's ear shape and lifestyle.
- Use only an appropriate ear solution and soft compresses, never cotton swabs.
- Massage the base of the ear, then let your animal shake its head before wiping the outside.
- Monitor for odor, discharge, and behavior to detect early signs of otitis.
- Contact a veterinarian at the first sign of abnormality rather than persisting on your own.
Frequently asked questions
Can I clean my pet's ears every day?
No, daily cleaning is generally not recommended because it can irritate the skin of the ear canal. It's better to follow a frequency suited to your animal's breed and ear condition, and ask your veterinarian for advice if in doubt.
How often should you clean a dog's or cat's ears?
This mainly depends on the shape of the ears and the animal's lifestyle: an animal with floppy ears or one that swims often will need cleaning more regularly than an animal with upright ears. In general, a weekly visual check allows you to adjust the frequency based on actual needs.
How do I know if my pet has an ear infection?
Signs to watch for include unusual odor, discharge, repeated scratching, or a head tilted to one side. These symptoms require prompt veterinary consultation, as cleaning alone does not treat an established infection.
Ear cleaning, performed with the correct technique and at the right frequency, remains one of the best preventive habits for your pet's auditory health. If you have any doubts about technique, products to use, or your companion's ear health, don't hesitate to seek veterinary advice from a qualified professional.
Leave a comment
Be the first to comment on this article.